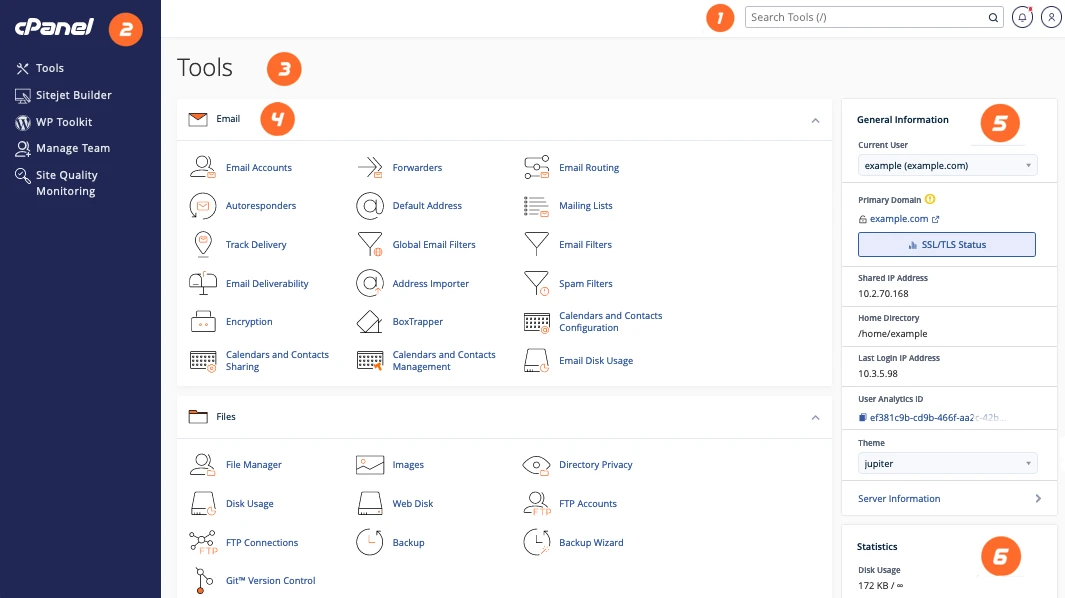
Creating a subdomain can be an essential step in organizing your website’s content. Whether you want to set up a blog, a support page, or a separate section for your e-commerce store, subdomains allow you to manage different areas of your site more effectively. In this guide, we’ll walk you through the process of creating a subdomain using cPanel, as well as some tips on how to utilize it best.
What Is a Subdomain?
Before diving into the how-to, let’s clarify what a subdomain is. A subdomain is a part of your main domain and serves as a separate address that can be used for different sections of your website. For example, if your main domain is example.com, a subdomain might look like blog.example.com or shop.example.com.
Subdomains are helpful for a variety of reasons, such as improving SEO, organizing content, and enhancing user experience.
Why Use Subdomains?
Organization: Keep your content structured. If you run a blog alongside your main website, a subdomain can help separate the two.
SEO Benefits: Search engines treat subdomains as separate entities, which can improve your overall site’s SEO if managed correctly.
Testing: Create a subdomain for testing new features or designs without affecting your main site.
Different Audiences: Cater to different audiences by creating tailored subdomains that speak directly to their needs.
How Do I Add Subdomains in cPanel?
Adding a subdomain in cPanel is a straightforward process. Here’s a step-by-step guide:
Step 1: Log into cPanel
First, you’ll need to log in to your cPanel account. Usually, this is accessible through your hosting provider's website. Look for a button or link that says "cPanel" or "Account Management."
Step 2: Locate the Subdomains Section
Once you’re in cPanel, scroll down to the Domains section and find the Subdomains icon.
Step 3: Create a Subdomain
Enter the Subdomain Name: In the text box next to your main domain name, type the name you want for your subdomain (e.g., blog).
Select the Domain: If you have multiple domains, select the appropriate one from the dropdown.
Document Root: cPanel automatically fills in the document root field (where the files for the subdomain will be stored). You can change it if needed.
Create: Click on the Create button. You’ll see a confirmation message once the subdomain has been successfully created.
Step 4: Verify the Subdomain
To ensure your subdomain has been set up correctly, try accessing it in your web browser. For example, go to blog.example.com. If everything is in order, you should see a page indicating that the subdomain is live.
How to Check Subdomains in cPanel
If you want to check your existing subdomains, you can do so easily:
Go back to the Subdomains section in cPanel.
You’ll see a list of all the subdomains you have created, along with their document roots and the option to delete or modify them.
How Do I Create a Subdomain and Install WordPress in cPanel?
Installing WordPress on your new subdomain is just as simple. Here’s how to do it:
Step 1: Log into cPanel
Again, log into your cPanel account.
Step 2: Go to the Software Section
Find the Softaculous Apps Installer or WordPress Installer icon in the Software section of cPanel.
Step 3: Install WordPress
Select WordPress: Click on the WordPress icon.
Install: Click on the Install Now button.
Choose Installation URL: In the dropdown menu, select your newly created subdomain (e.g., blog.example.com).
Site Settings: Fill in your site name, description, admin username, password, and email.
Select Plugins: You can choose to install any recommended plugins at this stage.
Install: Click the Install button.
After a few moments, WordPress will be installed on your subdomain!
Step 4: Access Your WordPress Site
Once the installation is complete, you can log in to your WordPress dashboard by going to blog.example.com/wp-admin. From here, you can customize your site, add posts, and manage settings.
Conclusion
Creating a subdomain is a powerful way to enhance your website’s organization and functionality. Whether you're building a blog, an online store, or a dedicated support site, subdomains allow you to tailor your content to different audiences and purposes.
Now that you know how to create a subdomain and install WordPress, you can expand your website’s capabilities and improve user experience. Don’t hesitate to experiment with subdomains to find the best fit for your needs! If you have any questions or want to share your subdomain creation experience, feel free to drop a comment below!


Post Your Comments